The Home Bicycle Workshop
Workshops and how others produce their craft fascinates me. After years of observing, researching, thinking and building, I open my shop up to you.
Not many years ago, my bicycle shop setup consisted of an unisulated, one-car garage, a mediocre portable bike stand and a rolling pegboard I built to hold all of my tools. It was a sweat box in the summer and my hands would become numb from cold in the winter, no matter how high I cranked the space heater. Many times, I would come out to frozen liquid degreasers. The shop simply didn’t work. But, that’s how many of us begin this journey.
With a big move, my wife and I progressed on to another house. A distinct upgrade in every way. While home hunting, a future bicycle workshop was a big part of my decision making progress. The house we found had a basement that I could envision housing a robust bicycle workshop. Clean, dry, completely open, insulated, heated and nothing in it but a big, blank slate ready to be developed.


Over the years, I collected a number of images of other shop setups. I used these as inspiration and took what I knew from my own experience. With it, my workshop emerged.
I wanted clear, distinct work zones:
A bicycle repair area, a wall of tools, a flat workspace, storage for larger items, smaller items and bolts, along with rag storage and miscellaneous bins.
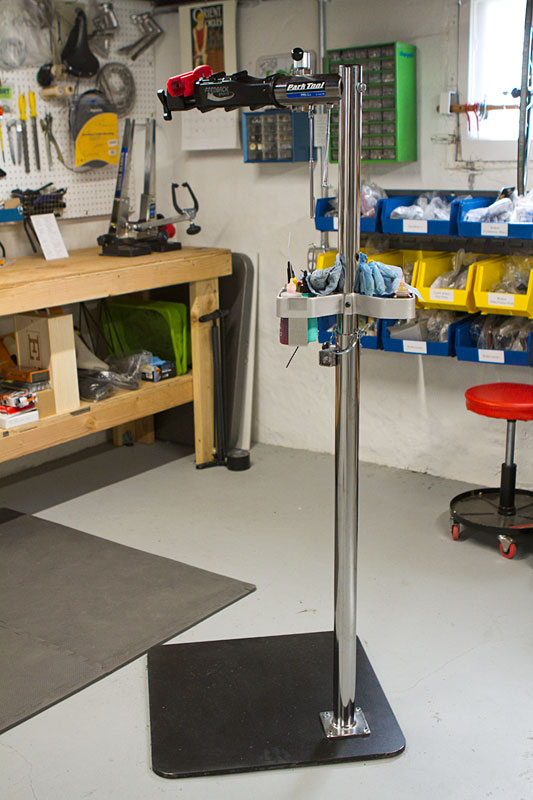
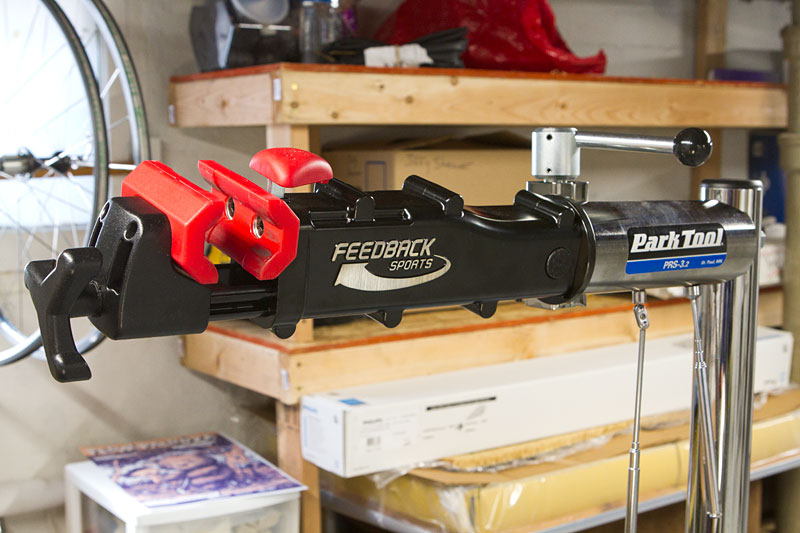
I previously used a Feedback Sports mobile tool stand because I was constantly moving my workspace around the garage. It worked well enough but there is something to be said for the solidity of permanence. Through personal recommendation by a buddy in the industry, he suggested a top dollar option that blended the best of both worlds. The stability of a Park professional stand, anchored down with a 50lbs steel plate, along with the easy-in, easy-out, push button ratchet-action system of the Feedback Sports Elite stand head. After using it for over a year, I have absolutely no complaints. It’s nice to know that if need be, this stand can easily hold a tandem bicycle… with the wheels on.
Storage for individual items strangely took the longest to iron out. Vintage bolt bins, made of sheet metal, were purchased from Craigslist and eBay. These were far superior to their modern, all-plastic counterparts that felt like toys. Where plastic bins came in handy is for storing nearly a foot of rags made from old sheets, t-shirts and other materials found over the years.
I learned that larger items, such as components, needed to be stored so I could clearly see what I had on hand. I found that when these items were stored in boxes, I tended to forget what I owned until I had time to sort through, and rediscover, the treasures.
Akro-Mills to the rescue. The bins are open for easy placing and grabbing, brightly colored to show the bin size and highly modular. Once the wall-mountable louvered panel is purchased, the configuration comes become seemingly endless.
These bins have been an incredibly effective solution and for anyone looking for a similar solution, I highly recommend the setup.


Lighting doesn’t seem like a big deal, but it really is. It is so incredibly crucial that it is the area I began with when I began physically developing the workshop.
Flickery, head-numbing florescent bulbs with temperamental ballasts are thankfully a thing of the past. LED lighting has proved superior in almost every way. I installed 11 banks of Philips Fluxstreem LED striplights throughout the shop. For days after, I felt like I was in a surgical room because the light was so bright and sharp. Since then, they have mellowed out just a touch, or my eyes have simply become used to the broad, powerful, white light spectrum. Purchasing this many light strips wasn’t cheap, nor was the installation, but the results are phenomenal allowing me to see every critical detail. This, along with the increased environmental responsibility has this purchase worth every penny.


What you don’t see from the photographs shown above is the other side of the shop. This space is reserved for bike storage. 12 bikes easily and safely hang, along with 3 hooks that are reserved for either a full wheelset or a bike frame. All waiting for restoration.
Although this post is focused purely on the workshop space itself, in the future, I hope to showcase the bicycle storage setup exclusively.
© Josh Capps and The Simplicity of Vintage Cycles. Unauthorized use and/or duplication of this material without express and written permission from this site’s author and/or owner is strictly prohibited. Excerpts and links may be used, provided that full and clear credit is given to Josh Capps and The Simplicity of Vintage Cycles with appropriate and specific direction to the original content.


beats the heck out of my Park stand next to the kitchen table and a toolbox of tools! Seriously that is one lovely shop.
Much obliged, Ryan! But, don’t sell yourself short. Even some master frame builders have unorganized and chaotic shops. The proof is in the product, not the shop!
Very nice shop! The white peg board does a lot. I have brown and the white just makes things show up much better
Thanks, Brian!
The white works well although I had an internal battle between outlining tools to make them even more visible. In the end, I decided against it. It would be easier for visibility but it also is a bit too permanent for me since I occasionally acquire/sell tools, which usually means reorganizing at least a portion of the board.
Plus, retaping seems like a tremendous amount of work to me. That just means that I have to be mindful of the job I do. So, if I do a brake job, once it’s through, I have to put all of the tools from that project back on the board. Then, I can do derailleurs (or whatever) because otherwise tools will start to mix and I may not remember where they all go when half of them are removed from the board.
Pros and cons, right?
Pingback: Thoughts on a New Workspace MLCB Post #233, November 15, 2017 – midlifecyclistblog
I’d love to get some more information about those lights. I’ve been looking for an LED option to replace old fluorescent lights. I have 2 banks of 4 x T8 tubes in my 11 x 15 workshop. Any idea of how many of the Philips strip lights I’d need to replace them? I hate the buzzing, flickering fluorescent lights, but I have to say that they are amazing task lighting. Do you think LED lights are just as good for task lighting?
Hi Ben,
Now that I’ve had the Philips Fluxstreem LED striplights in my shop for a couple years, I can say that I am still just as pleased with them as I was when they were installed. I do believe hey have “cooled” just a little since installation as they were so bright I felt like an operating room. Or maybe my eyes have since just gotten used to it. I tend to think it is the first situation though.
I spaced my lights so that there was one light ever 8′ vertically and every 5.75′ horizontally, if that makes sense. It’s plenty of light in that much area. I likely could have gotten away with less but…
For task lighting, I have an architect lamp above my vise for hub rebuilds and delicate work. It’s yellow light seems fine enough, especially since I can position it close but if you can pop an LED light under your workspace, I would highly encourage that. It’s just cleaner, whiter light that works better for details.
Also, if you hate the buzzing and flickering, once you install these you will won’t have to deal with it again. They are silent and instantly come on. I’ve never had any issues and I would never go back to fluorescent or any of that older technology now. LED just has too many benefits.