1985 Raleigh Portage (Part V)
After two years, the fruition of a final product emerges: A legendary touring frame, blessed with stock 650B wheels, morphed into an upright city bike. Keeping my plans quiet and not rushing has allowed me to focus on a product that was exactly what I had envisioned since the beginning. But taking a frame, so deeply seated in touring roots and tweaking it to create a delicate balance of upright cycling harmony was far from simple. Mostly everything needed to be rethought. Or at least the most challenging elements had to be like the drivetrain, gearing and cockpit. In fact, the only original parts left on the bicycle are the brakes, the Flickstand and the Raleigh Heron head badge. Although the head badge did get new rivets. Everything else was either purchased new or in lightly used condition.
Another goal was to create a product of impermanence. Sure, it’s an upright city bike now but my overall desire was to have it set up so that over the course of a weekend, I could swap what I needed to easily revert back to the touring juggernaut it was born to be. Nothing is to the point where it cannot be undone to benefit whatever feel the bike is going for.

1985 Raleigh Portage
With so many previous posts (1, 2, 3 and 4) regarding this frame, most topics have been addressed. But, now that assembly is complete, there are still a number of elements to look closer at, so some images below will dive deeper than others. Some shots speak for themselves. But since this build took more time, effort and funding than any other project I have had thus far, I have included a larger than normal amount of images to showcase the final product. And like usual, for those of you who want to trudge further into the weeds, don’t forget to check out the full build specs at the bottom of the post.

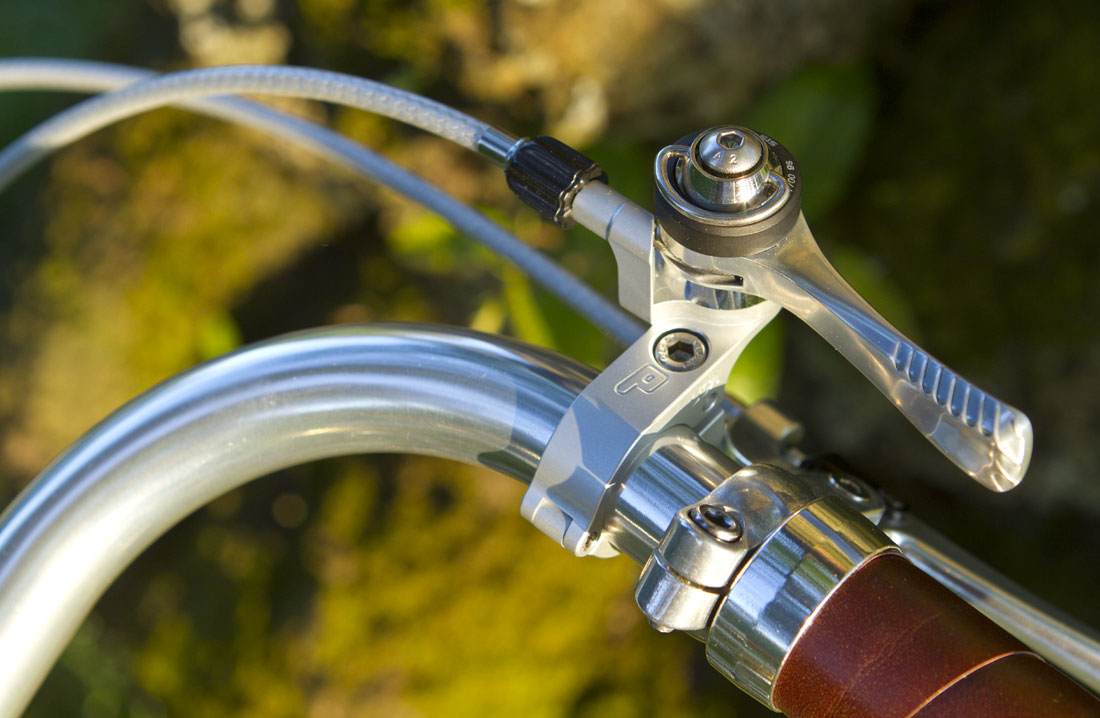
Comfortable Nitto Albatross bars gracefully sweep back to keep me upright. The bar ends are capped off by slender Brooks leather grips for an elegant look with a durable finish. The Paul Thumbie shifter keeps my hands on top of the bars so there is no reason for them to wonder anywhere else.


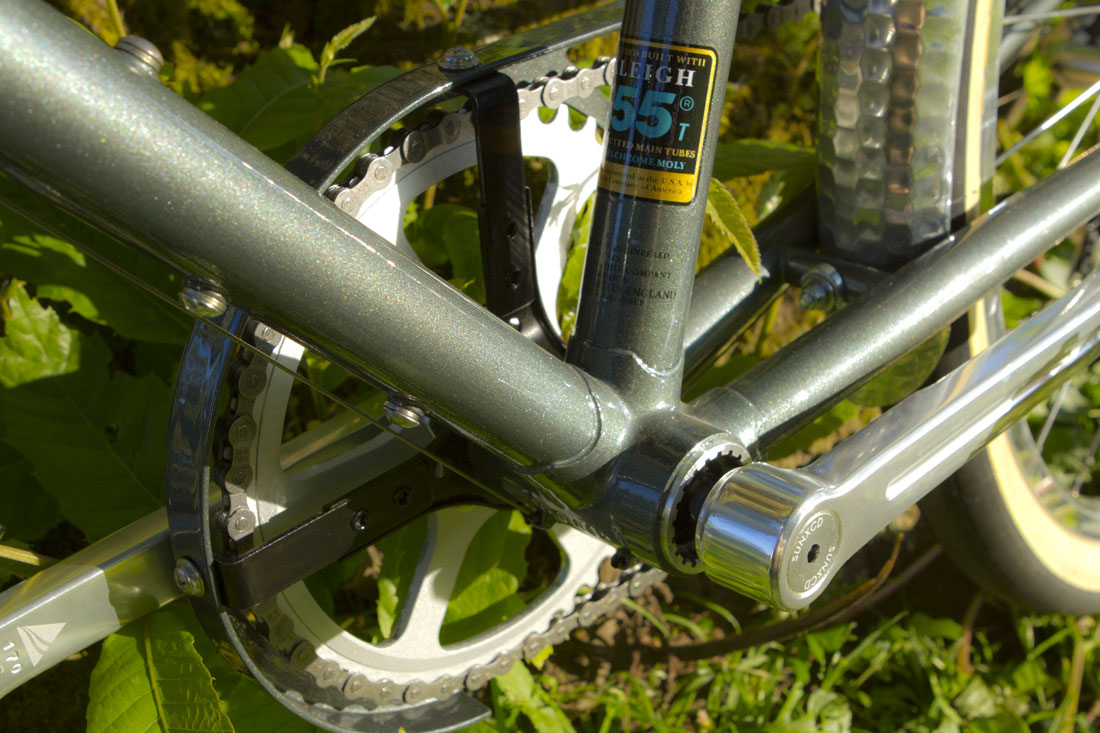
Frame alteration is a funny thing. By adjusting what a manufacturer has already determined “finished” one runs into elements they may not have had to considered otherwise. By moving the top mounted cable guides to cable stops on the side of the tube, the issue of where the brake cable cut through the decal became alarming. Luckily, both the frame builder that performed early alterations and the painter, who applied the decals, perfectly placed their respected work allowing the brake cable to pass precisely through the a logical spot in the decal.

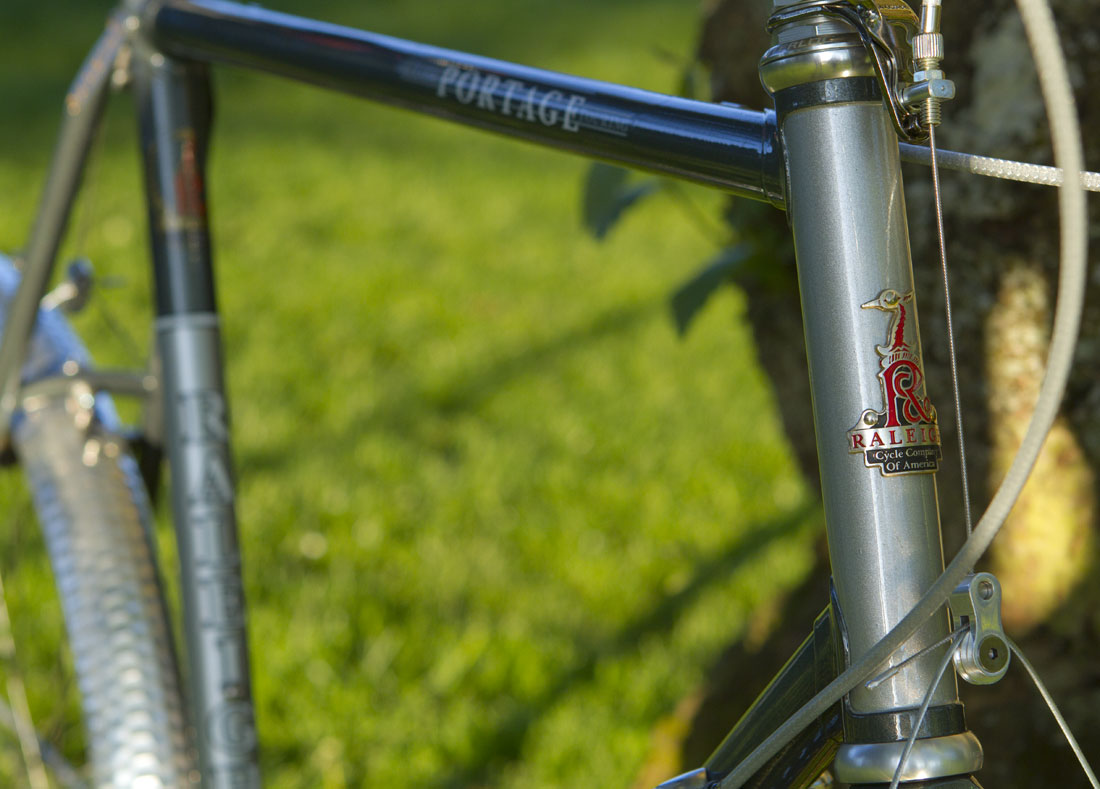
The frame originally came to me in a sad condition. It also came with very few usable parts. One piece I vowed to keep was the history that remained on the head badge. As I have mentioned before, despite the punishment the frame took in the past, the Raleigh Heron still stands proud.

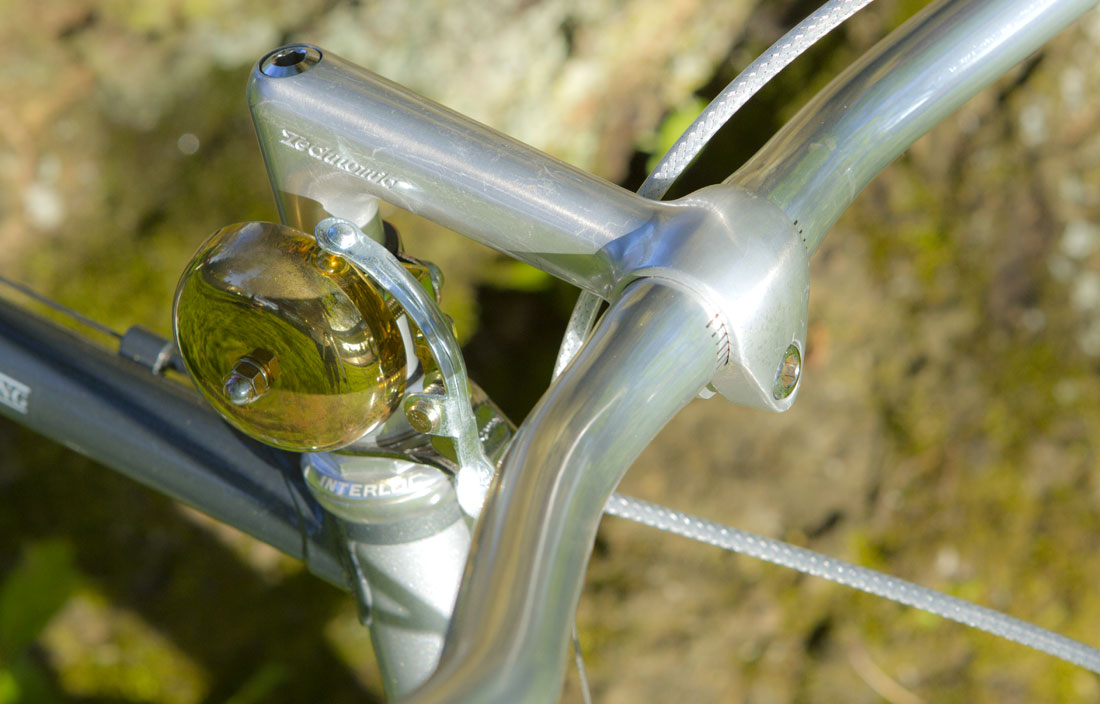
Since the Shimano BR-MC70 brakes came with the frame, and being that they are legendary cantilever brakes, I absolutely wanted them on the final build. No cable hangers were provided, so this gave me an excuse to purchase the Velo Orange Grand Cru straddle wire roller hangers. These were the style of hangers used on some of the finest constructuer bicycles ever made. They are cleverly engineered in their cable pinch, setup is a snap and they look gorgeous. Do they perform any better than standard plate washer pinch bolts? So far, no. Not really. Do they look better? Unquestionably, yes.


Raleigh branded Flickstand and boss to secure it
The Flickstand. Some hail it as a brilliant little device while others claim it is a silly gimmick. Regardless, this little gizmo is the last standing piece of original equipment on the frame. But, with the fenders on, the item is utterly useless. Its intention is to facilitate easy parking by positioning the wire device downward, grabbing onto the front tire and allowing for one to easily lean the bike without the steering mechanism turning causing the bicycle to fall. My intention was to show that there is an actual boss brazed on the frame dedicated for this specific device. The Flickstand’s I have seen previously are typically a thick black mounting strap that goes around the down tube that looks clunky but gets the job done. A boss gives a clean mounting point and if I hadn’t installed fenders, I likely would keep the unit mounted on but with no point for its function, it will be removed and was only shot on the bike for posterity. Also fascinating is that the item is specifically Raleigh made. That in itself seems to be quite unique.
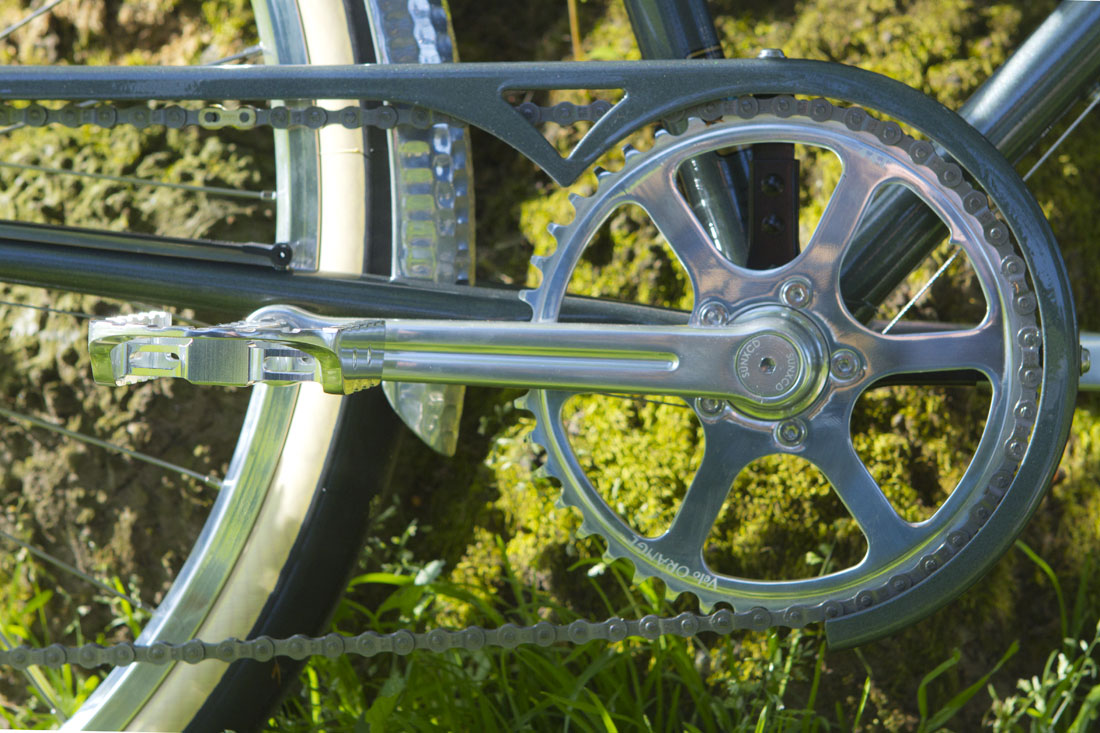

The chain guard has been a must-have since inception of this project. An upright commuter bike means casual clothing and trousers that may get caught in the drivetrain or soiled by grease while riding is unacceptable. The Civia chain guard was the most minimal guard I could find and I liked it so much, I had it painted to match the frame. Although a strong idea on paper, a number of issues came up that I had not expected. First, it can only accommodate, at most, a 44-tooth chainring. This isn’t too big of an issue, but it played into the selection of the rear cassette range. Also, the rear connection for the guard was not as I had envisioned since most chain guards are mounted on straight, single-cog setup. Having a rear cassette and derailleur made adjusting the guard tricky to keep it out of the way of chain travel and, at the same time, make sure the guard was straight and level. So far, it seems to work but I’m keeping a close watch on it as frame flex may change the tolerances.
Does it look good? Absolutely! I feel that it is one of the most gorgeous modern chain guards I have seen.

Soma Oxford pedals have larger platforms than their MKS competitors and also accept toe clips

The chainslap strap mount with Compass Bicycles “Champion” brand rubber strap looks right at home

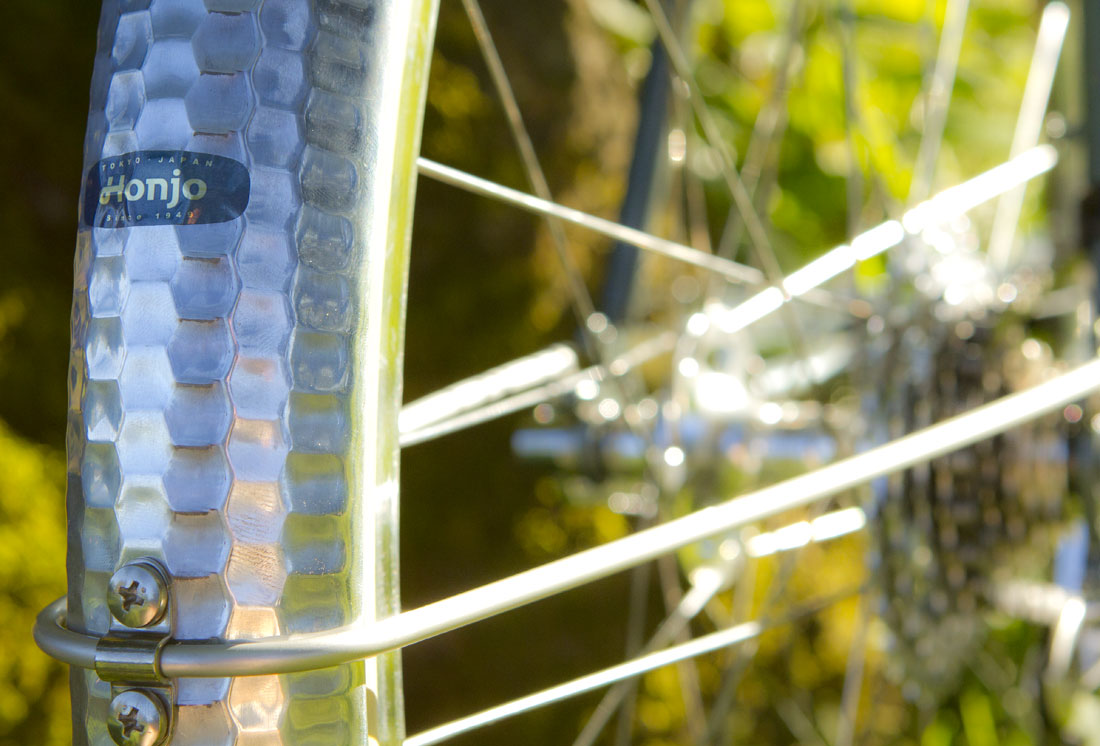
Surprise! Honjo fenders do not come with any instructions other than a few small bags of parts and some scraps of paper with Japanese typed on them. For those of you interested in installing these fenders on a future build, be aware that they are extremely challenging and non-user friendly fenders to install. The payoff is tenfold however as they are the highest quality metal fenders I have ever owned. Pros and cons.
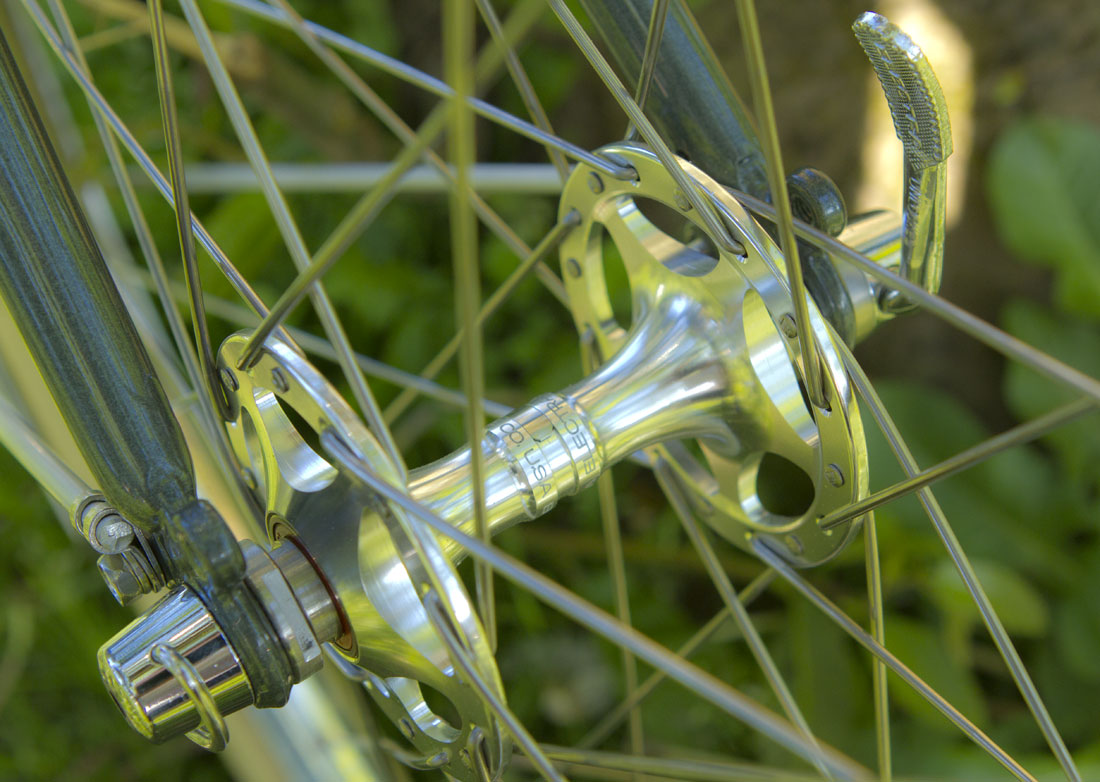
Some say that Campagnolo C Record “Sheriff Star” hubs were some of the most beautiful hubs created in their illustrious 25 year run. Some also say they were too fragile. Either way, unearthing a pair commands patience and premium prices so I went elsewhere. Electra, a name certainly not known in the vintage world, created a handsome pair of Sheriff Star replicas complete with sealed cartridge bearings instead of cups and cones and “a bit more metal at the flanges, which might make them a little more durable, or at least more confidence-inspiring than the originals — assuming the C-Record reputation for fragility is true.” The hubs are simply gorgeous and are some of the smoothest I have ridden on. Both form and function are satisfied to the highest degree.

Velocity boasts, “Atlas. So strong it can hold up the world.” And that Art Deco logo isn’t too shabby either!
Color: Sage green metallic with silver panels
Frame Size: 59cm (C-T) seat post & 57cm (C-C) top tube
Frame/Drop-outs: 555 T Double-butted chro-moly steel; Suntour
Fork: 555 T chro-moly steel
Bars: Nitto B352 Albatross
Bar Grips: Brooks Slender Grips; Brown
Bell: Origin8; Brass
Stem: Nitto Technomic
Headset: IRD Techno-Glide
Saddle: Brooks B17; Brown
Seat Post: SR LaPrade A-83; Fluted
Chain Guard: Civia Bryant
Crankset: SunXCD Exceed 170mm cranks; Velo Orange Grand Cru 44T chainring
Rear Derailleur: SunXCD Exceed
Shifting: Paul Thumbie shifter mount with Shimano Dura-Ace 7700 lever
Brake Levers: Tektro FL750
Brake Calipers: Shimano BR-MC70 with Velo Orange Grand Cru straddle roller hangers; Koolstop pads
Cable and Housing: Shimano road with Velo Orange metallic housing
Cassette: 9-Speed Shimano HG-80 (11/12/13/14/16/18/21/24/28)
Chain: SRAM PC-951
Hubs: Electra Ticino Lux
Wheels: Velocity Atlas; 650B; 32h polished; Electra skewers
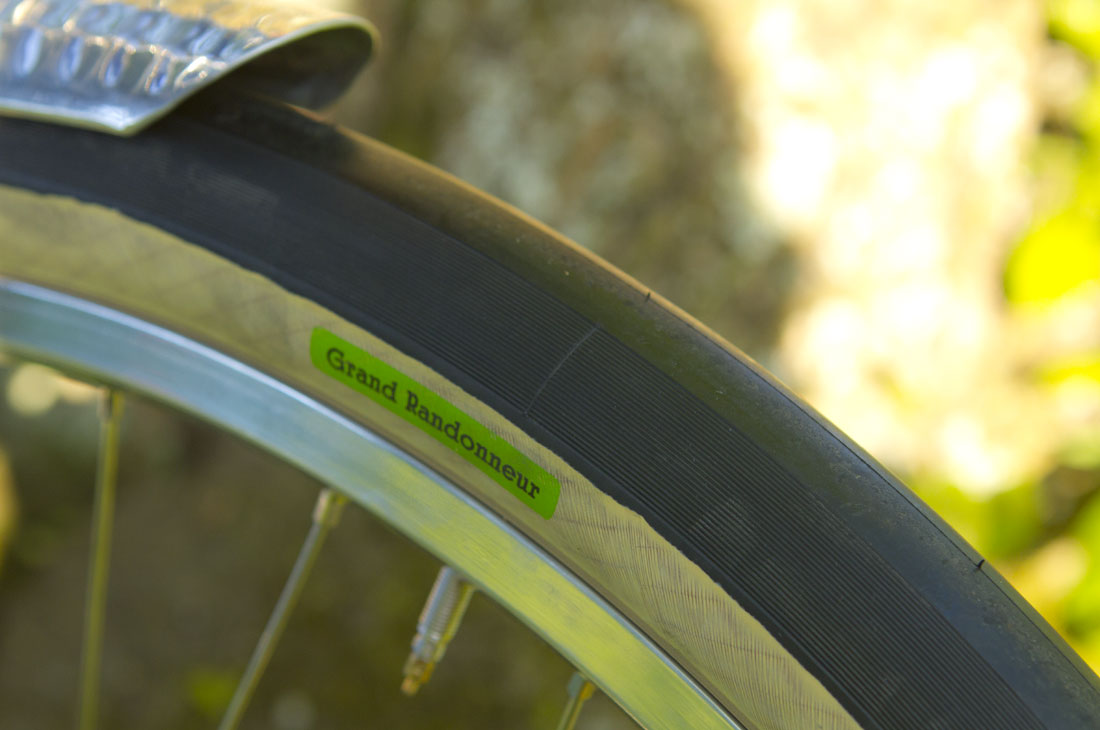
Tires: Pacenti; 650B x 38 (Updated since post)
Fenders: Honjo; 52mm, hammered
Pedals: Soma Oxford
Special Features: Double eyelets front/rear; Three bottle mounts; Flickstand mount; Chain rest; Brazed-on mounts for front/rear rack; Chainslap strap mount
© Josh Capps and The Simplicity of Vintage Cycles. Unauthorized use and/or duplication of this material without express and written permission from this site’s author and/or owner is strictly prohibited. Excerpts and links may be used, provided that full and clear credit is given to Josh Capps and The Simplicity of Vintage Cycles with appropriate and specific direction to the original content.


Wow! What a beauty. The chain guard is an inspiration. I hope it works out. Nice to see the Brooks bits in keeping with its British heritage. I hope you’ll share how you like those big Soma tires–they look interesting.
Thanks for the kind words, Nola!
As mentioned, the chain guard took some serious work and even now, I’m not totally satisfied. The biggest issue is that the chain cannot make it to the largest two cogs on the cassette without rubbing on the guard. Even so, that still leaves me with 7 other gears, which isn’t too bad especially if this bicycle is only used to run around the city. If it was converted back to a touring rig, the chain guard would certainly come off.
The Soma tires are an experiment, especially since most everyone running 650B tires are using Compass tires (including you!). I picked these up for a song so I figured I would give them a shot. So far, they seem to pick up quite a bit of debris and also generate a fair amount of road noise. I may try playing around with the tire pressure to see if that helps anything. What are you running your Meral’s tires at?
One thing I did notice is whenever I roll over cracks and bumps in the road. It’s like a big, soft pillow compared to my other tires which are significantly lower in width than these monster 42mm’s! I’m a believer in 650B!
I am running the Compass Loup Loup tires at about 42 lbs front and 46 rear. I started out higher in the rear, but since I switched to the front bag/rack for commuting, this seems about right. The comfort is amazing, and yet they still have excellent traction cornering at high speeds.
Good to know your tire pressure details, Nola.
42 lbs is quite low. What is the “Minimum” the tires state they are rated for on the sidewall?
Hi Josh, it does seem low – but translates to about 3 bar. The max pressure indicated on the sidewall is 75 psi, with no minimum indicated. My understanding is that because the tires are wide, with higher volume, the lower pressure is what works best. I started out at about 50 psi, and kept experimenting. Then I read this article by Jan Heine: https://janheine.wordpress.com/2015/01/26/the-tire-pressure-revolution/
and found that he is using 43 psi on his Compass tires. I suspect he weighs more than I do – 🙂 so I even wonder if I could experiment with lower pressures – but for now this seems just right for my kind of riding.
Wow! I would have never guessed that the ratty frameset that I picked up for you on Craigslist here in Lexington, KY would end up such a beautiful complete bicycle! Job well done and glad that I could help be part of it.
The images you sent, before I purchased the frame, with bubbling rust and cable guides that looked like they were falling off, got the most disheartening comments back from my friends. A pal of mine, who owns a bike shop here in Portland said, “Do you have a boat? You don’t? Well you really need one because that is a perfect boat anchor!” Ouch! Although after showing him the final results, he gave a resounding, “this is your best build yet!” Compliments like that, from him, don’t come without some serious work so I know I must have done something right.
Thanks again for the assistance in facilitation of the frame, Rob. You certainly were a major part of this build. I couldn’t have done it without you.
Hi Josh, the bike looks superb, considering the thought and effort you’ve put into restoring I hope you have lots of fun actual riding.
Cheers
Pete
Thanks for the nice note, Pete!
This build certainly challenged me but each mile I’m logging my smile seems to get bigger and that anxious feeling of a perpetual “shake down” ride is disappearing as I massage out the adjustments that need to be made.
The last addition is the rando bag for the front. I’ll make sure to update the post (or create a new one) when it all comes together.
Gorgeous bike. Bravo, Josh.
Thank you so much for the kind words (and the reblog).
Reblogged this on Velo Finds and commented:
Gorgeous.
Josh, I’ve been so preoccupied in researching my Carlton, I’ve been neglecting to check out your accounts of the Portage project. I went back and checked out all your posts and must compliment you on a fantastic job. When you described the project to me, you were overly modest. Congratulations on a beautiful piece of bicycle work.
Cheers . . . David Caraher
I sincerely appreciate the comments, David. You’d think that a blank canvas is nothing but a joy to develop but throughout the process, it was a delicate build with plenty of revisions. In the end, however, I am quite pleased with the results.
Although, there is still one more element to the build not yet revealed. Nothing monumental but an addition I feel it is lacking for true city riding usability. I plan to update the photographs once the alteration is made.
Lovely. Tastefull. Bravo. I’ve heard that the tires you opted for are supposed to be wonderfull. I find your observations interesting. Have you considered 28mm, which is a size also available?
Thank you for your thoughts, Mark! The tires, so far, are fat and cushy. Exactly how I had hoped they would be. I was going for the biggest and fattest tire I could run, so no, 28mm didn’t even creep into my mind.
I inflate the tires to 50psi (they could probably go lower) and smile as they seamlessly glide over bumps and cracks in the road. After spending so much time on 28mm tires, the same situation being thrown at me would have my body stiffen and grip increase ever so slightly, bracing for the impact. Not with 650b. It’s is the real deal!
Now I can match the bike and blog with the person-met you at the C&V ride out of VeloCult, I was the guy with the Weigle Competition. Extra nice job on this one!
Hi Mark,
Ah yes, the Raleigh/Carlton Competition. Your bicycle was simply top notch. Really well done on so many levels! It was my pleasure meeting and riding with you. Let’s do it again sometime, especially since we live so close!
Really nicely done! Those Electra hubs are a really nice touch.
In the final stages of a ’72 Competition/GS rebuild myself and stumbled across your notes on treating paint chips from the 1986 Club Fuji post a few years ago. Curious on your experience or opinions on clear coat enamels and how they hold up — any difference between nail polish or model paint? Should I care that neither is really meant for long term or outdoor applications, i.e. UV exposure?
I’m mostly interested in rust protection, so I’m probably not going to try to match any paint except maybe the trademark Carlton silver primer where bare metal is currently exposed. Testor’s offers a “chrome” that seems perfect so I’m leaning toward their clear coat as well. But if I can pick up some Sally Hansen’s Hard as Nails and call it a day it would save some budget for the next build!
Hi Jackson,
Thanks for the comments!
Regarding your ’72 Competition, I have been using Model Master Acryl clear semi gloss now for a bit as my clear coat for spot touches. The substrate has held up OK over time. I feel that it could blend a bit better but it does coat the blemish and dry back clear so I suppose it fits the bill. I do think there are better options but I haven’t done much investigating as the spot touches I am making are usually quite small.
No, these clear coats aren’t made for long term and/or outdoor applications but I garage my bicycles when not in use. When I ride to work, they come in to the office with me and if I ride for shopping or errand running purposes, my bicycles are never locked up for more than an hour and usually it’s under some sort of covered parking. Do they get rained on? I live in Portland, so, yes, sometimes they do. But over their lifespan with me, my bicycles spend 99% of their lives indoors. I feel like those are some good odds that the materials I use, although not certified for constant outdoor punishment like automotive products, will stand a fair amount of time.
That’s the sense I get – I live in San Francisco, where the threat of theft is the biggest risk with prolonged outdoor exposure, so none of my bikes see that much of our famous fog or sun if I’m not actively riding.
The only options I can find for outdoor products come in aerosol cans, and while I guess one could get a body shop to work up a small batch of epoxy that will resist UV and harden more quickly, you’d have to work fast and even the professional clear finish on my brushed aluminum Specialized from 2011 looks a little yellowed where it has chipped. I’ve read of similar results from folks who’ve tried to clear coat bare metal frames even employing a proper finisher.
So Testor’s it is! So much fun to ride, though, the hard part will be giving the bike enough time after application for the paint to harden — part of why I’ve left it for after I’ve made all the mechanical fixes and attendant dings to the frame. If I didn’t have another bike, I might have decided on Sally Hansen’s, since that stuff is engineered to cure quickly (though maybe not as thoroughly).
I feel that you are spot on with your logic considering your riding habits and styles. Testor’s isn’t a bad product and an upgrade from Sally’s clear coat but not such a big financial jump. It may be one of those things where you’ll have to reapply the substrate after a few years but it would be something like 5+ years in the future for riders like us. If your bike was left out, 24/7, it may be more of an annual thing.
Good luck and if you have any updates on the process or outcomes, please feel free to update us through your comments!
Nicely done! Just found your blog a few months ago. I really like that chainstay protector. I have never seen one like that. I am glad to see folks taking older bikes and making them their own and solving problems in the building process.
I wish I could claim the chainstay protector my own but debuting by French constructeurs such as Alex Singer and Rene Herse, decades previously, means the idea is now in its renaissance. I’m OK with that, especially when both form and function are being matched equally.
Josh,
What a beautiful build, really did the Raleigh Heritage a great honor! I like the use of the SunXCD components, especially the cranks…..their profile reminds me of the old Sugino Might Comp or SR Royal cranks of the 70’s. I too plan to use some SunXCD bits on my Motobecane re-build.
Also I may have missed it in your story line but who did the paint job? Looks better than new!
Thank you for the extremely kind words, Kris. The build was quite the labor of love. I wanted to deck the frame out in original Suntour bits but as the project moved forward, and new parts went on, I realized the blend of old and new may not work out as I originally anticipated. Knowing that Suntour was long gone but in its place is the Sun brand. It made me realize I could still build the project with new parts but with the legend of Suntour behind it. I like to think it worked out.
As for the paint, I had it done here locally in Portland at a shop called RAD Finishes. In the end, I am pleased with the quality. There really is nothing like the shine of a freshly coated frame!
Pingback: 1986 Raleigh Portage | The Simplicity of Vintage Cycles
What a beautiful build! it looks like it must be a delight to ride – Chapeau!
My most sincere gratitude on your comment.
The ride is a delight but, as an update, I ended up taking off the chaingaurd due to the chain was rubbing while in the top two rear cluster gears.
Pingback: 1986 Raleigh Portage | The Simplicity of Vintage Cycles